I am sure you have seen some of the virtual choir videos floating around the internet recently, now that America is under lockdown due to COVID-19. Perhaps you have wanted to try one yourself! Here is an example of one that I made a few weeks ago:
So, how is this made? Well, there are many ways this can be done. I personally used Adobe Premiere Pro to make the video and mixed the audio in Logic Pro X. However, those are expensive, so I will show a way to accomplish this in a free program called “Davinci Resolve 16.” (Available at https://www.blackmagicdesign.com/products/davinciresolve/ ) This is available for Mac/Windows/Linux. When giving instructions for the participants, I sent out this blurb:
This virtual choir is made from individual recordings of people singing from their homes and then mashed all together in the end! This is a way we can all sing together
Each person will take a video of themselves singing while using headphones listening to the base track. The headphones are used so only your voice is recorded, not the track as well
I then gave a link for the participants to download a base instrumental (demo) track to listen to on headphones while they recorded a video of themselves singing their part. One other tip is to have people clap a few times immediately before starting the demo track on their headphones to give you, the editor, an easy way to line up the tracks later on.
The first thing you will want to do in the editor is import your media
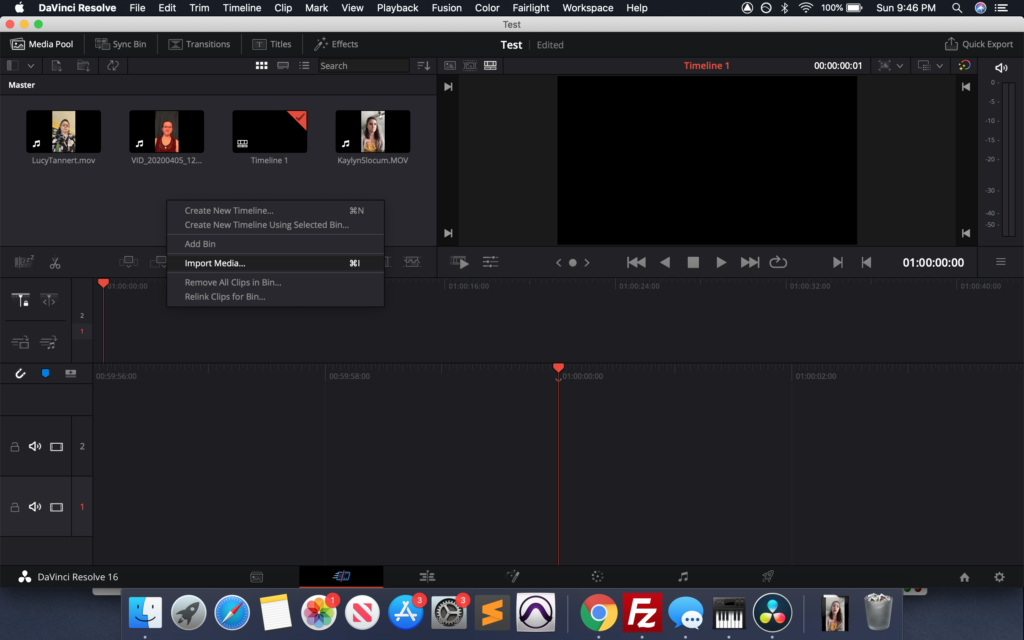
This can be done by right clicking in the media are and selecting “import media,” or by hitting Ctrl/CMD + i to open that dialog box. Next, lets switch over to the editing view. This is done by toggling the icon in the bottom area with the horizontal bars (to the right of the button selected by default. Then drag in the demo track that you had everyone record from as the base to line up all the video files against:
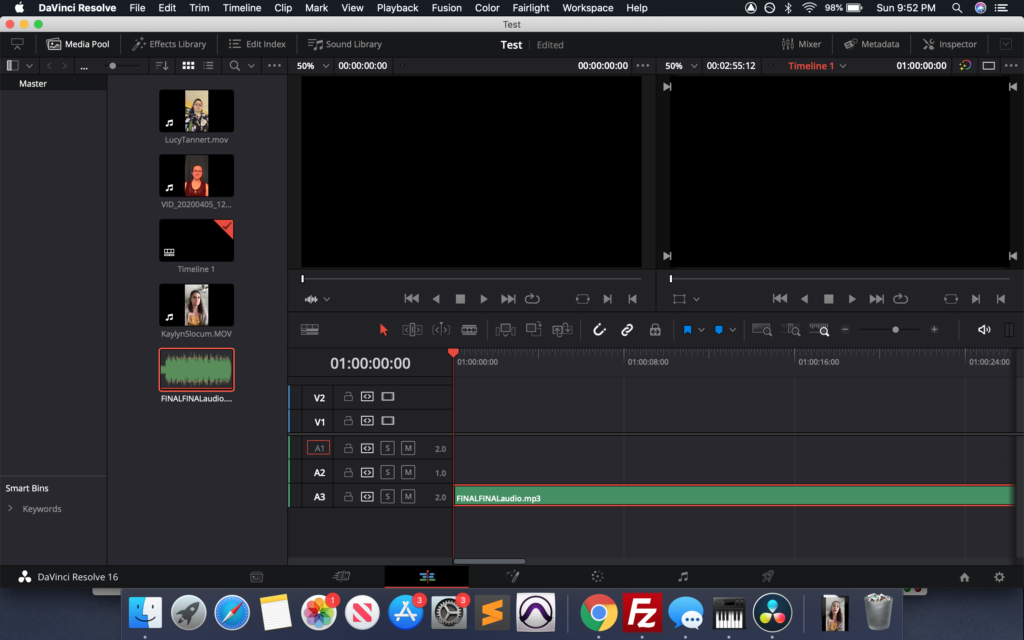
Next, start dragging over some videos that you have imported into the timeline.
By default it will start at the beginning, but we may have to move it to align with the audio:
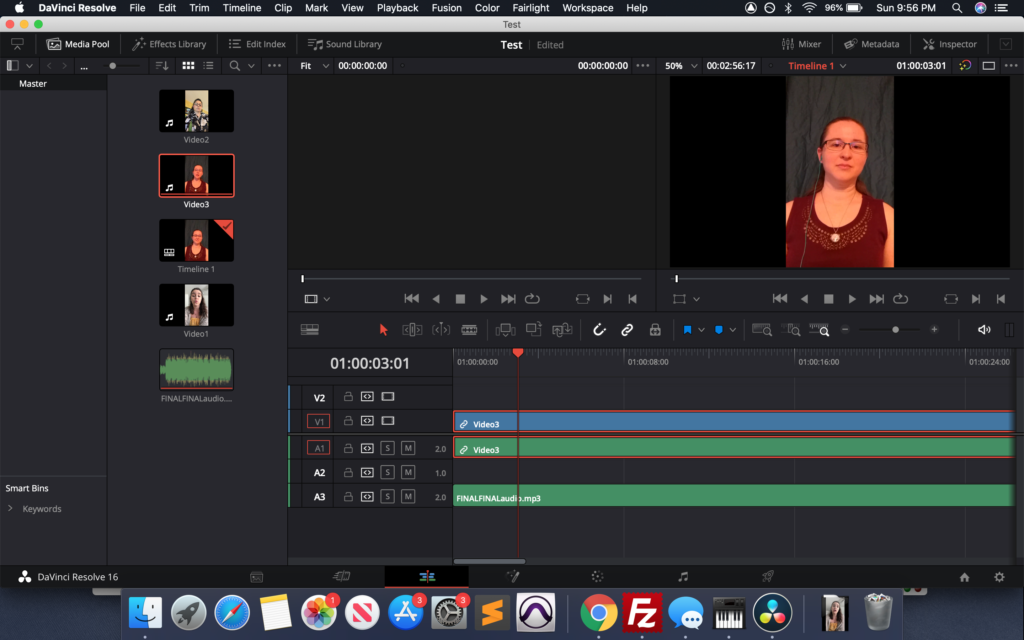
Trim Videos
When you have aligned the tracks at the correct starting points, you can trim the beginning of the video so they will all start at the same time, and leave room for an intro screen. To trim a video, hold your cursor over the start of the video and click and drag the desired direction:
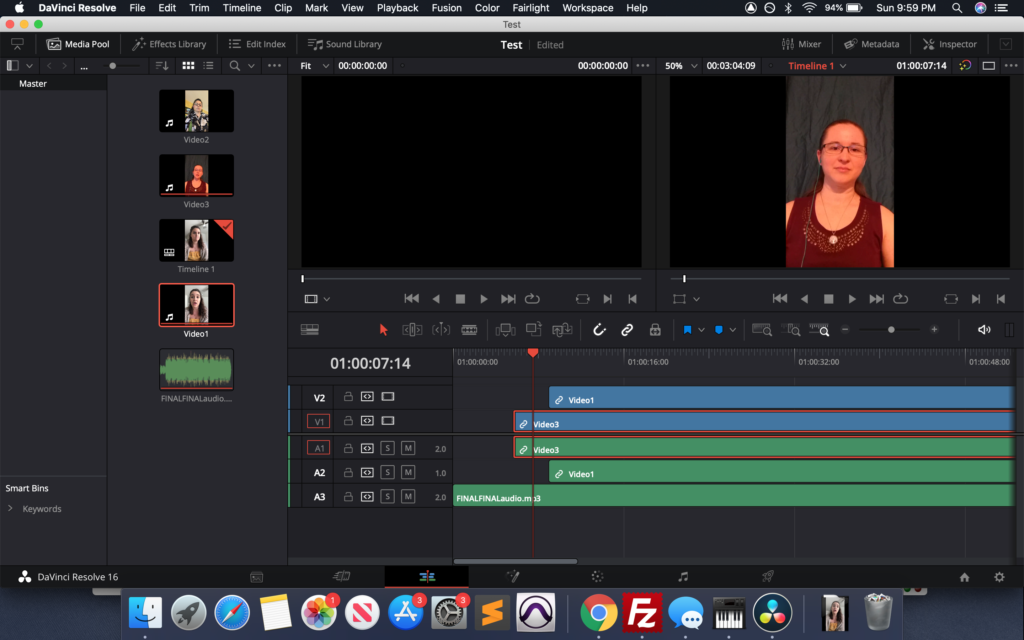
Edit Clips
Once all the clips are at the right place in the timeline, you can start to edit the size and positioning of each clip. To do this, click on the video layer and find the icon below the preview area that looks like a box with dots in the corners. This gives you the edit menu dropdown. To move and scale the video, select the transform tool. To crop, select crop:
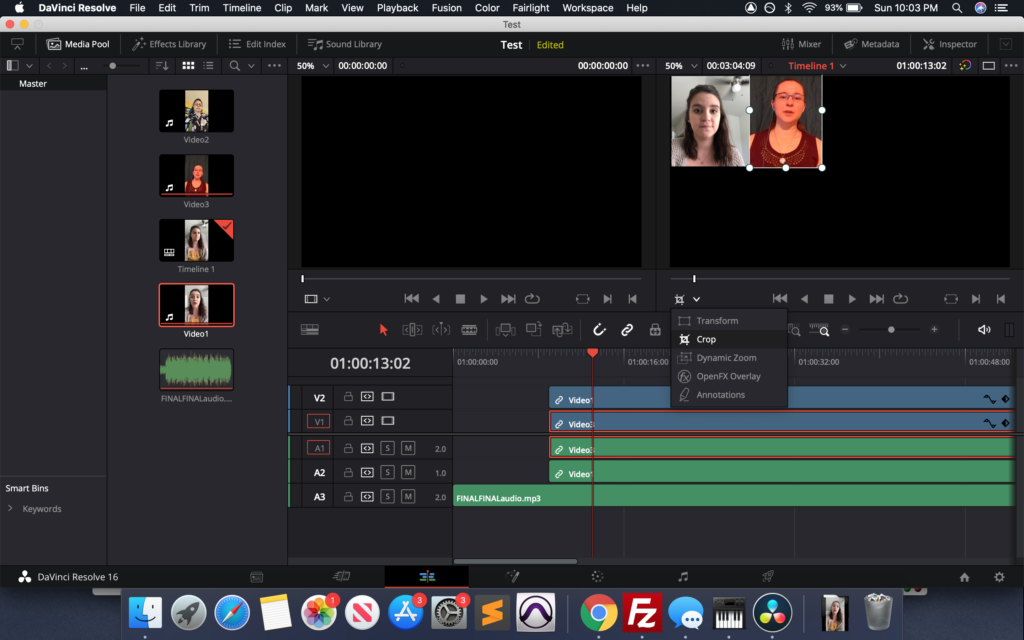
Note* You may need to temporarily disable some tracks for non-choppy playback when aligning tracks. To do this, hit the rightmost icon on the video layer. This will allow you to focus on just the track at hand. Just remember to turn it back on before saving!
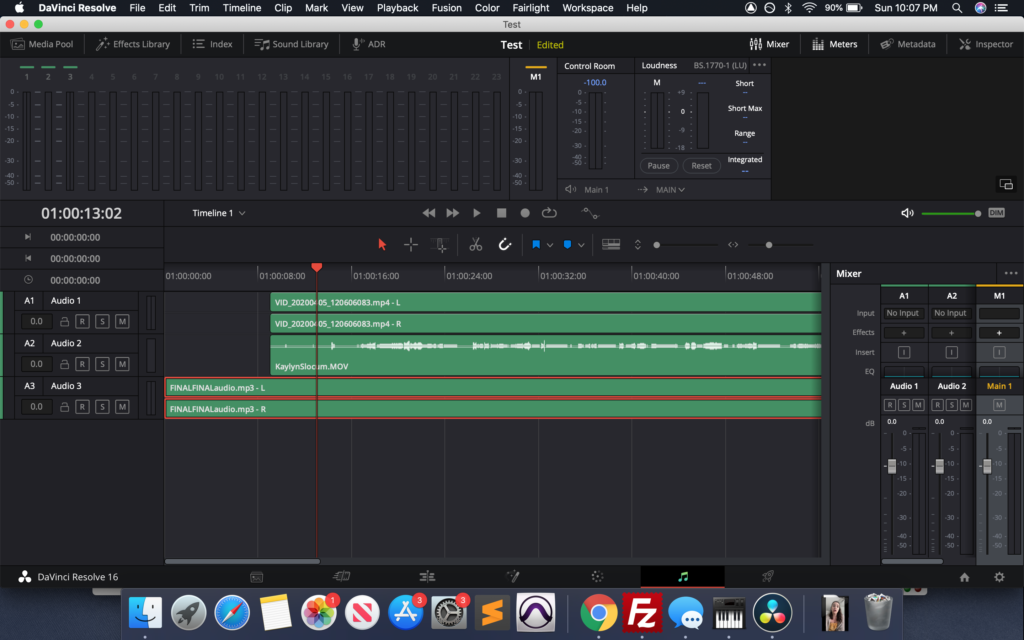
Edit Audio
Finally, you might want to add some audio effects to make it sound more “choir-ish.” For this, we head to the music icon in the bottom bar which takes us to the audio view. On the lower right side you will see a section called “Main” -this will apply to all tracks combined:
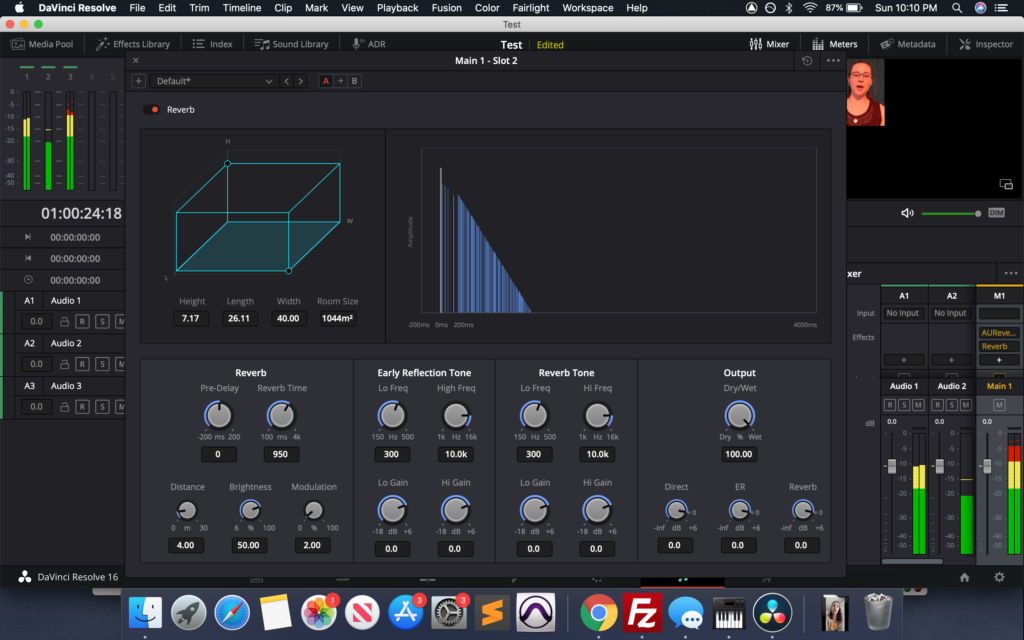
You can add effects here by hitting the “+” button under “M1.” I recommend reverb, since that makes it sound like you are in a concert hall listening to a live choir! Here is an example of the FairlightFX Reverb. You can drag the handles of the 3d Cube to adjust the reverb effects:
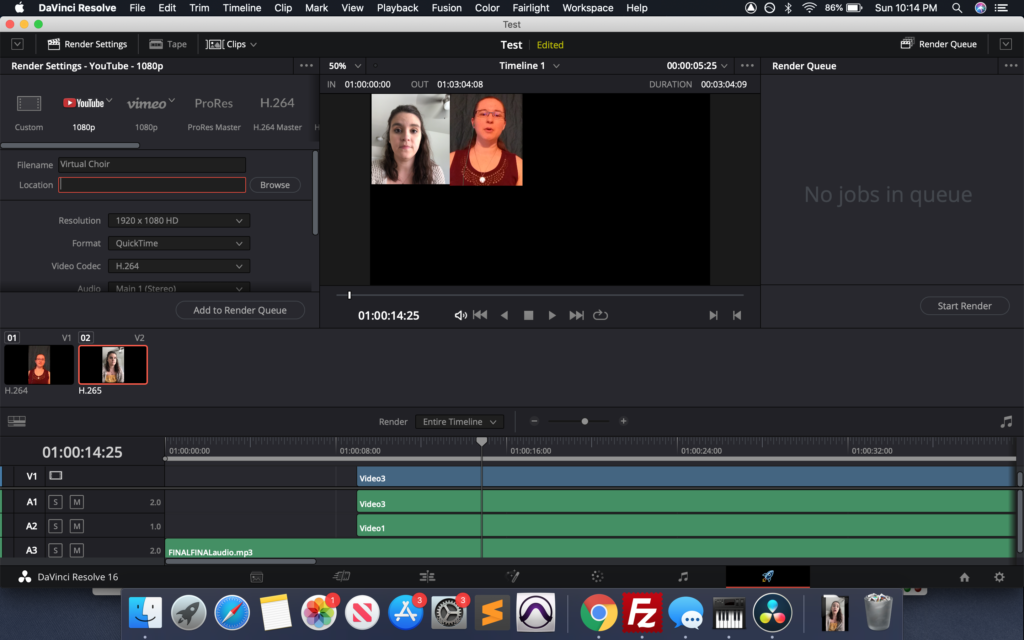
Save
Finally, when you are all done, head over to the fantastic rocketship icon at the bottom, and choose your saving options. Youtube preset is a safe bet. Choose your filename and folder location, and render this puppy!
And you’re done! This was a very simplified tutorial but it should get you started! Feel free to contact me if you have questions on more technical aspects